Integration CI/CD Automate Tools
1. CI/CD Tools
What is CI/CD tools?
CI/CD stands for Continuous Integration and Continuous Delivery/Deployment, which are methodologies that enable teams to consistently integrate new code and reliably deliver updates of their software.
Continuous Integration (CI):
This is a development practice where developers integrate code into a shared repository frequently, typically multiple times a day. Each integration can then be verified by an automatic build and automated tests. The key goals of CI are to find and address bugs quicker, improve software quality, and reduce the time it takes to validate and release new software updates.
Continuous Delivery (CD):
Following CI, Continuous Delivery automates the delivery of applications to selected infrastructure environments. Most teams work with multiple environments other than the production, such as development and testing environments, and CD ensures there is an automated way to push code changes to them.
Continuous Deployment (CD):
A step beyond Continuous Delivery, Continuous Deployment goes further by releasing every change that passes through the production pipeline to customers with no human intervention. It requires a highly developed culture of monitoring, automated testing, and quality assurance to work effectively.
Most Popular CI/CD tools
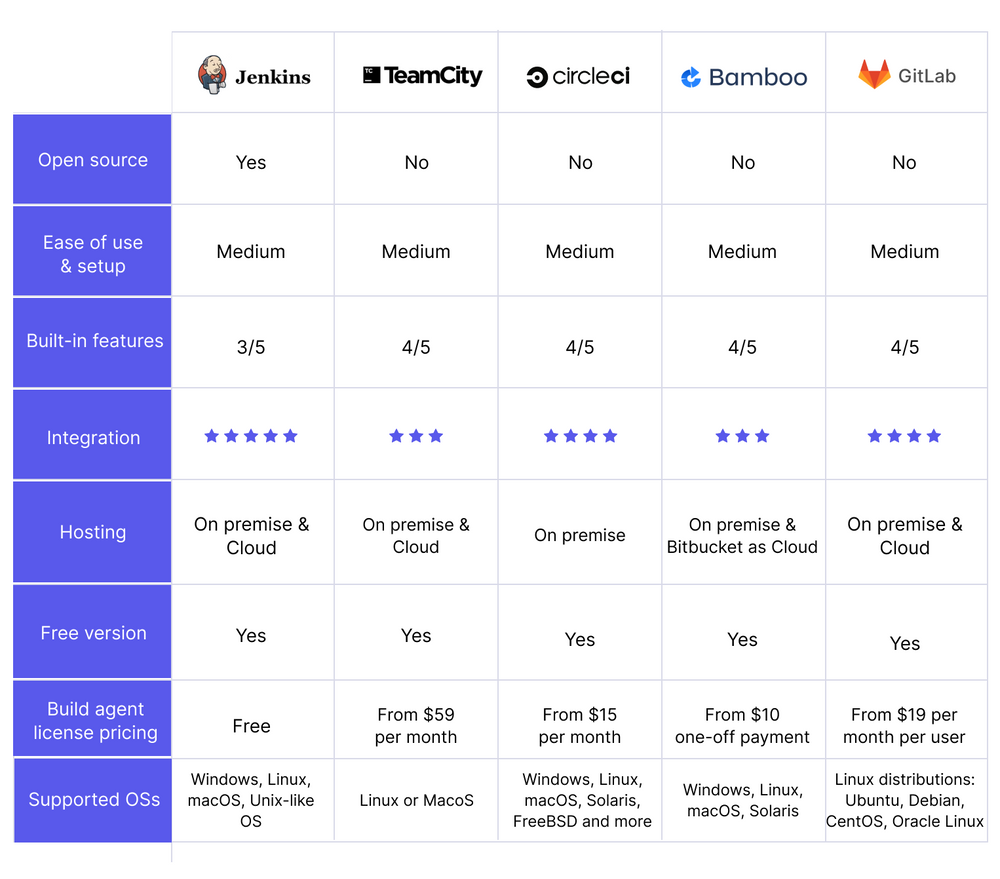 As image above, there are most popular CI/CD tools, pricing and the complexity, you can refer:
Jenkins: An open-source automation server providing an impressive plugin ecosystem to support building, deploying, and automating any project.
GitLab CI/CD: Integrated into the GitLab platform for source code management, it provides a rich set of features for automating different phases of the application lifecycle.
CircleCI: Cloud-native CI/CD service that provides infrastructure for automating the software development process.
Travis CI: A hosted, distributed continuous integration service to build and test software projects hosted at GitHub and Bitbucket.
GitHub Actions: Enables workflows for continuous integration and continuous deployment directly in the GitHub platform.
Bamboo: A CI/CD server from Atlassian, it offers automated building, testing, and deploying of applications.
Spinnaker: An open-source, multi-cloud continuous delivery platform for releasing software changes with high velocity and confidence.
Azure Pipelines: Part of Microsoft’s Azure DevOps Services, this cloud service is used to automatically build and test code projects and make it available to other users.
2. Install Jenkins on Bastion Host
We will install Jenkins on Bastion Host.
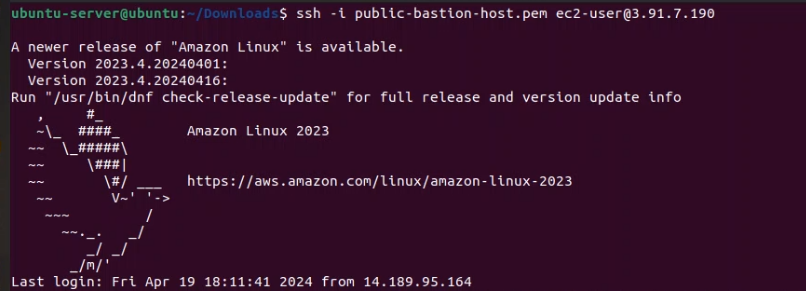
2.1 SSH to Bastion Host
ssh -i public-bastion-host.pem ec2-user@YourEC2PublicIPV4
2.2 Configure Security for Jenkins
At terraform source code, we have configured inbound security group for Jenkins allow access from Internet to Jenkins server via port 8080
ingress {
from_port   = 8080
to_port     = 8080
protocol    = "tcp"
cidr_blocks = ["0.0.0.0/0"] # Warning: This allows traffic from any IP which might not be secure.
}
detail: https://github.com/daotq2000/aws-iaac-terraform/blob/main/aws-resources/05_sg.tf
2.3 Install Java on bastion host
Install Java on EC2 Amazon Corretto 11 has a ‘headless’ variant available. This variant omits runtime dependencies that are typically associated with GUI applications such as X11 and ALSA and is worth considering for server-oriented workloads. The ‘headful’ variant adds support for X11 and ALSA. There is also a ‘devel’ package which contains the JDK development tools, as well as a ‘jmods’ package that contains the Amazon Corretto 11 JMods used to create custom runtime images.
Install the headless Amazon Corretto 11:
sudo yum install java-11-amazon-corretto-headless
After installed we need find path of Java in directory
sudo update-alternatives --config java

2.3 Downloading and installing Jenkins
Completing the previous steps enables you to download and install Jenkins on AWS. To download and install Jenkins:
Ensure that your software packages are up to date on your instance by using the following command to perform a quick software update:
[ec2-user ~]$ sudo yum update –y
Add the Jenkins repo using the following command:
[ec2-user ~]$ sudo wget -O /etc/yum.repos.d/jenkins.repo \
https://pkg.jenkins.io/redhat-stable/jenkins.repo
Import a key file from Jenkins-CI to enable installation from the package:
[ec2-user ~]$ sudo rpm --import https://pkg.jenkins.io/redhat-stable/jenkins.io-2023.key
[ec2-user ~]$ sudo yum upgrade
Install Java (Amazon Linux 2023):

[ec2-user ~]$ sudo dnf install java-17-amazon-corretto -y
Install Jenkins:
[ec2-user ~]$ sudo yum install jenkins -y
Enable the Jenkins service to start at boot:
[ec2-user ~]$ sudo systemctl enable jenkins
Start Jenkins as a service:
[ec2-user ~]$ sudo systemctl start jenkins
You can check the status of the Jenkins service using the command:
[ec2-user ~]$ sudo systemctl status jenkins
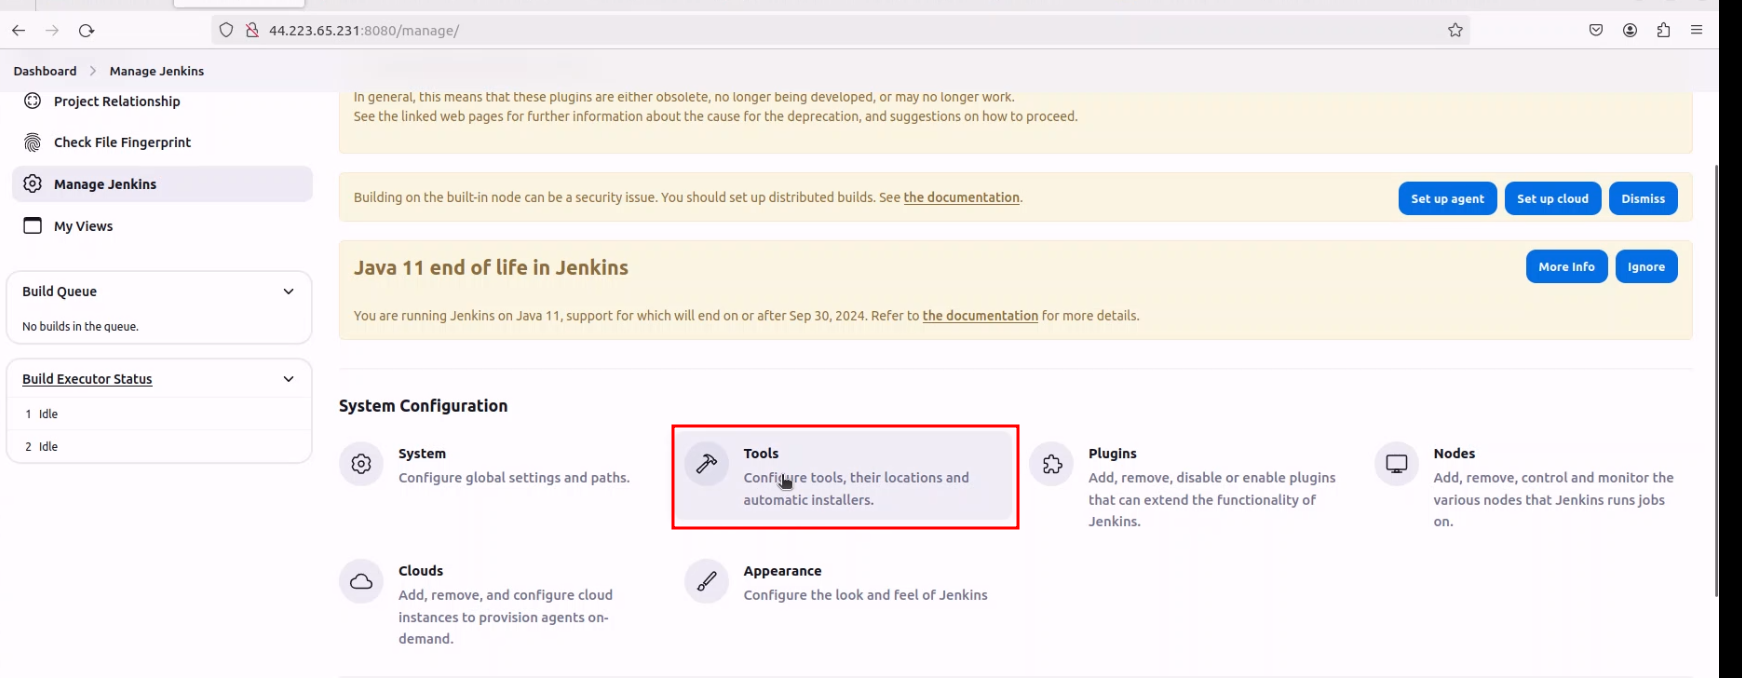
2.4 Configure Exec build Java on Jenkins Server
Go to Manage Jenkins => Tools => JDK Installations
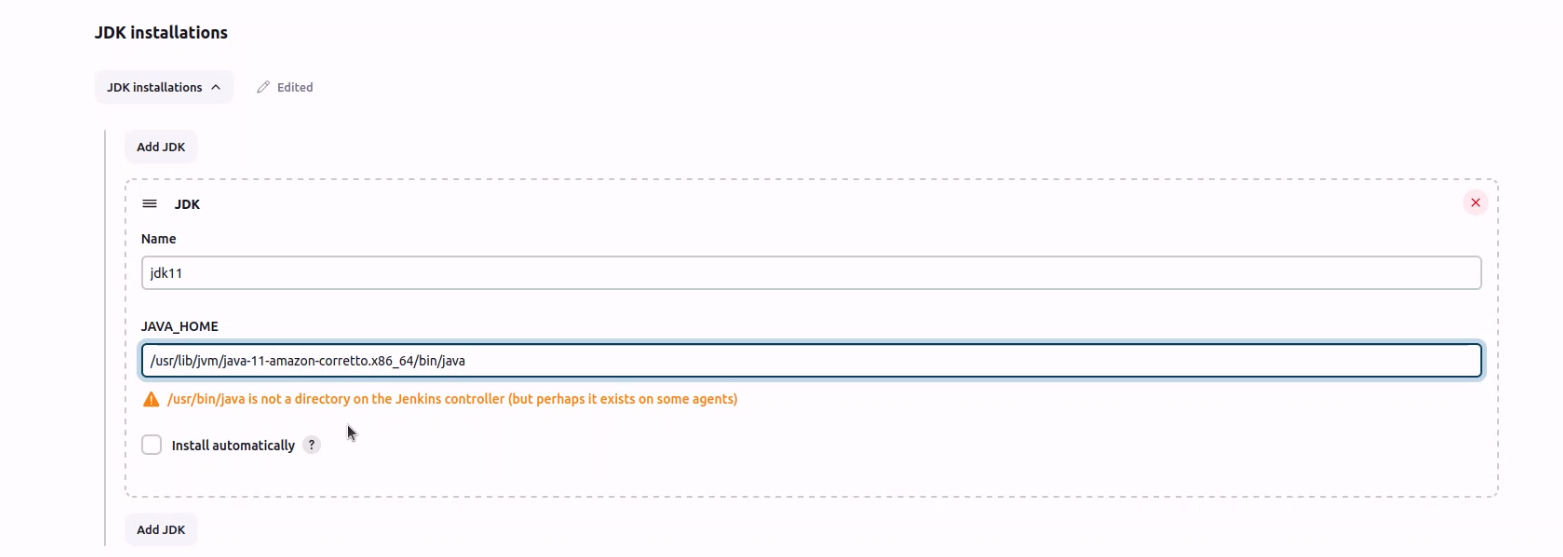
 Find path Java installed
 Config Java directory for Java path
3. Install Docker on Bastion Host
You can refer post install docker on Amazon Linux at here or following constructions step below:
Apply pending updates using the yum command
sudo yum updateSearch for Docker package:
sudo yum search dockerGet version information:
sudo yum info dockerInstall docker, run:
sudo yum install dockerAdd group membership for the default jenkins user so you can run all docker commands without using the sudo command:
sudo usermod -a -G docker jenkinsEnable docker service at AMI boot time:
sudo systemctl enable docker.serviceStart the Docker service:
sudo systemctl start docker.serviceGet the docker service status on your AMI instance, run:
sudo systemctl status docker.serviceRestart jenkins server to execute docker
sudo systemctl restart jenkins
Outputs:
  docker.service - Docker Application Container Engine
  Loaded: loaded (/usr/lib/systemd/system/docker.service; enabled; vendor preset: disabled)
  Active: active (running) since Wed 2021-09-08 05:03:52 EDT; 18s ago
  Docs: https://docs.docker.com
  Process: 3295 ExecStartPre=/usr/libexec/docker/docker-setup-runtimes.sh (code=exited, status=0/SUCCESS)
  Process: 3289 ExecStartPre=/bin/mkdir -p /run/docker (code=exited, status=0/SUCCESS)
  Main PID: 3312 (dockerd)
  Tasks: 9
  Memory: 39.9M
  CGroup: /system.slice/docker.service
  └─3312 /usr/bin/dockerd -H fd:// --containerd=/run/containerd/c...

  Sep 08 05:03:51 amazon.example.local dockerd[3312]: time="2021-09-08T05:03...
  Sep 08 05:03:51 amazon.example.local dockerd[3312]: time="2021-09-08T05:03...
  Sep 08 05:03:51 amazon.example.local dockerd[3312]: time="2021-09-08T05:03...
  Sep 08 05:03:51 amazon.example.local dockerd[3312]: time="2021-09-08T05:03...
  Sep 08 05:03:52 amazon.example.local dockerd[3312]: time="2021-09-08T05:03...
  Sep 08 05:03:52 amazon.example.local dockerd[3312]: time="2021-09-08T05:03...
  Sep 08 05:03:52 amazon.example.local dockerd[3312]: time="2021-09-08T05:03...
  Sep 08 05:03:52 amazon.example.local dockerd[3312]: time="2021-09-08T05:03...
  Sep 08 05:03:52 amazon.example.local systemd[1]: Started Docker Applicatio...
  Sep 08 05:03:52 amazon.example.local dockerd[3312]: time="2021-09-08T05:03...
  Hint: Some lines were ellipsized, use -l to show in full.
4. Configuring Jenkins
Jenkins is now installed and running on your EC2 instance. To configure Jenkins:
- Connect to http://<your_server_public_DNS>:8080 from your browser. You will be able to access Jenkins through its management interface:
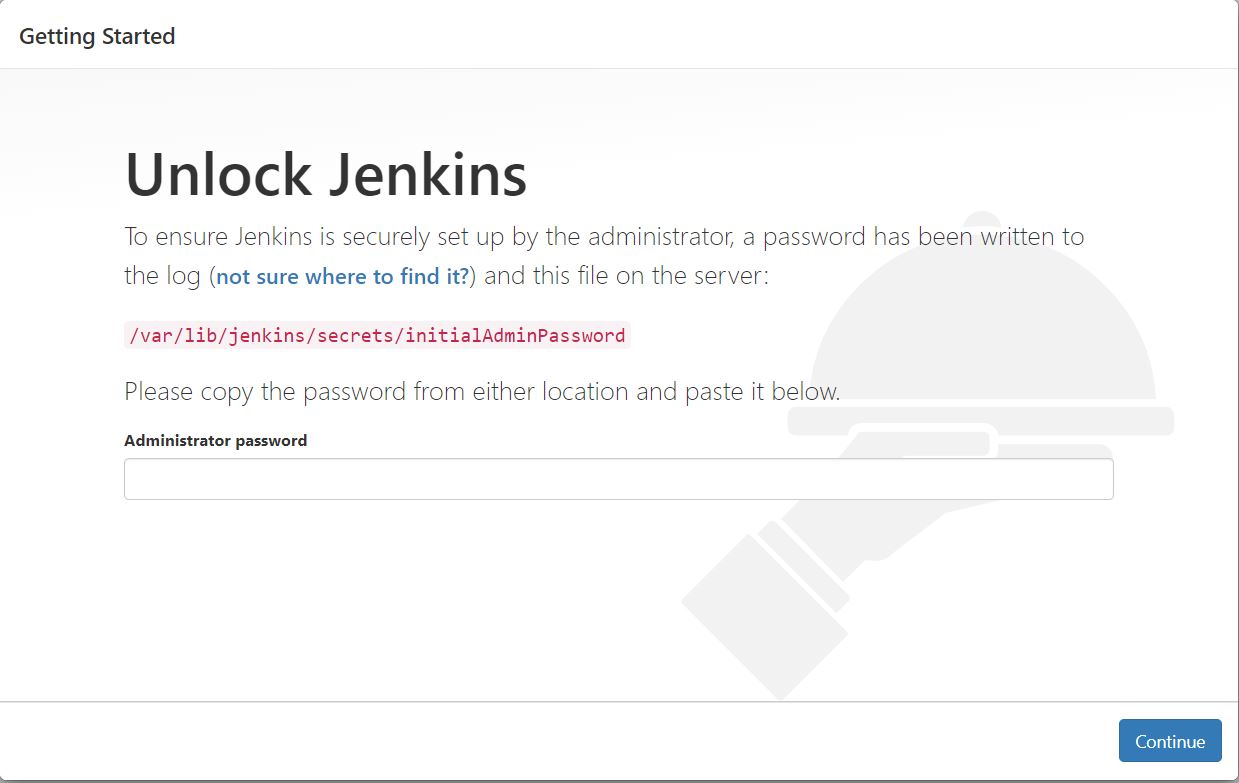 Jenkins Password
 - As prompted, enter the password found in /var/lib/jenkins/secrets/initialAdminPassword.
Use the following command to display this password:
[ec2-user ~]$ sudo cat /var/lib/jenkins/secrets/initialAdminPassword
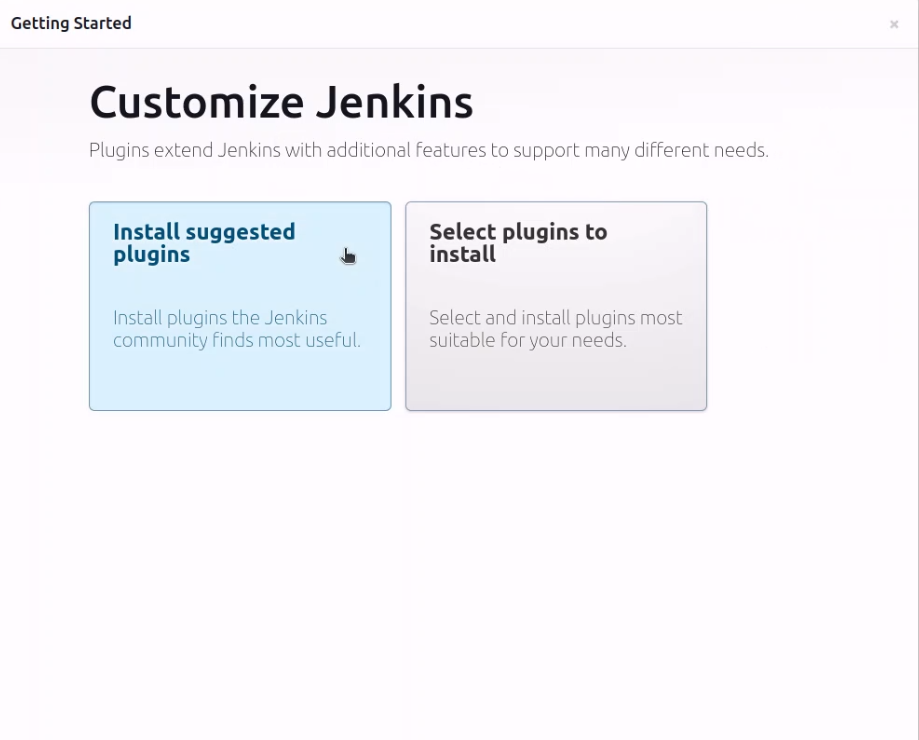
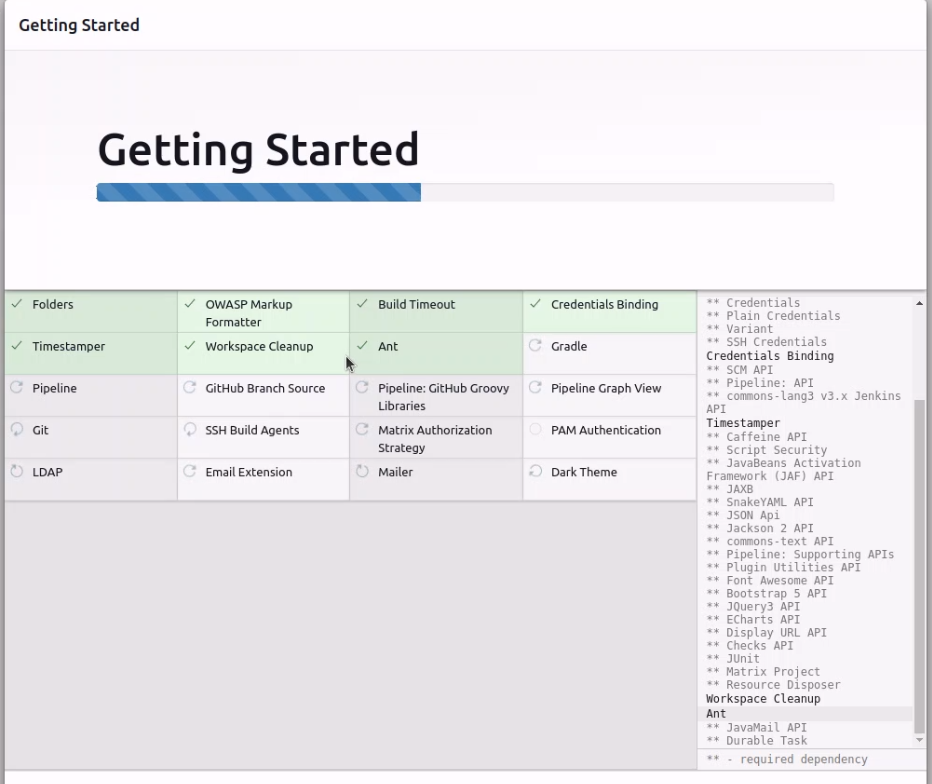
The Jenkins installation script directs you to the Customize Jenkins page. Click Install suggested plugins.
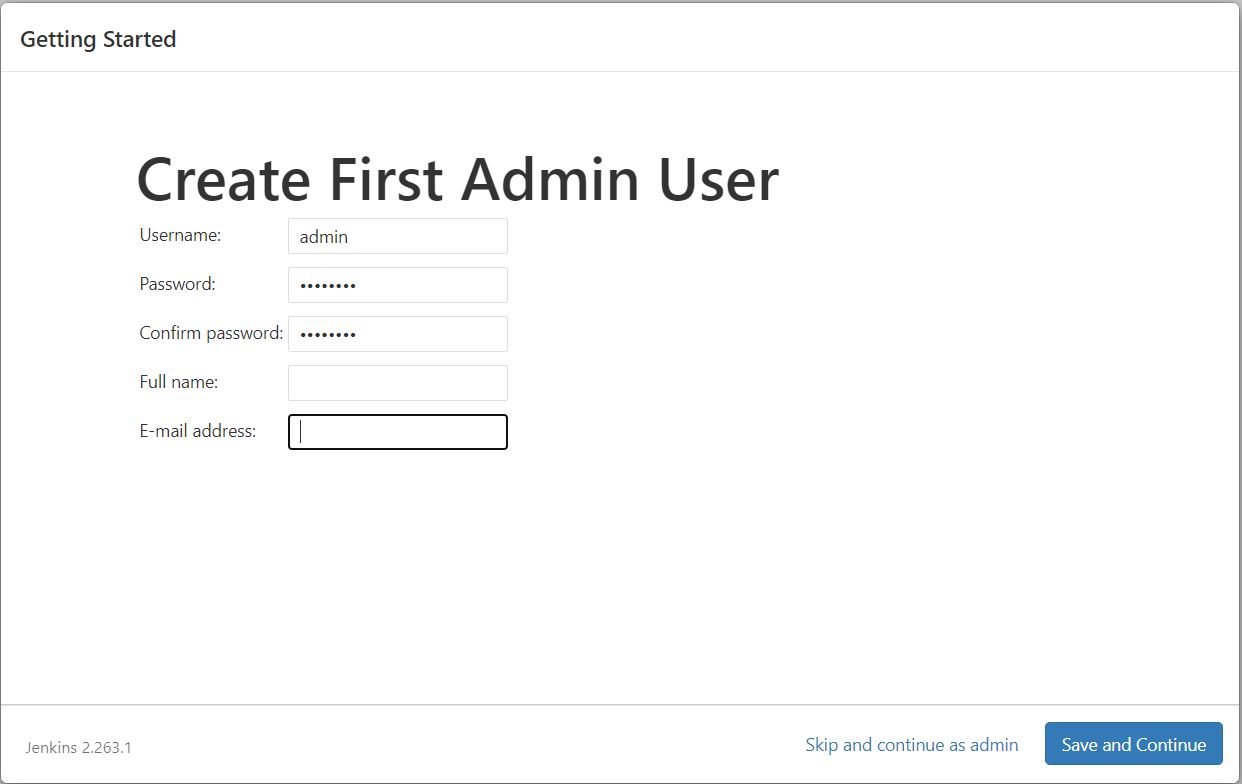
Once the installation is complete, the Create First Admin User will open. Enter your information, and then select Save and Continue.
When you go to home page jenkins, if you see node offline like image below:
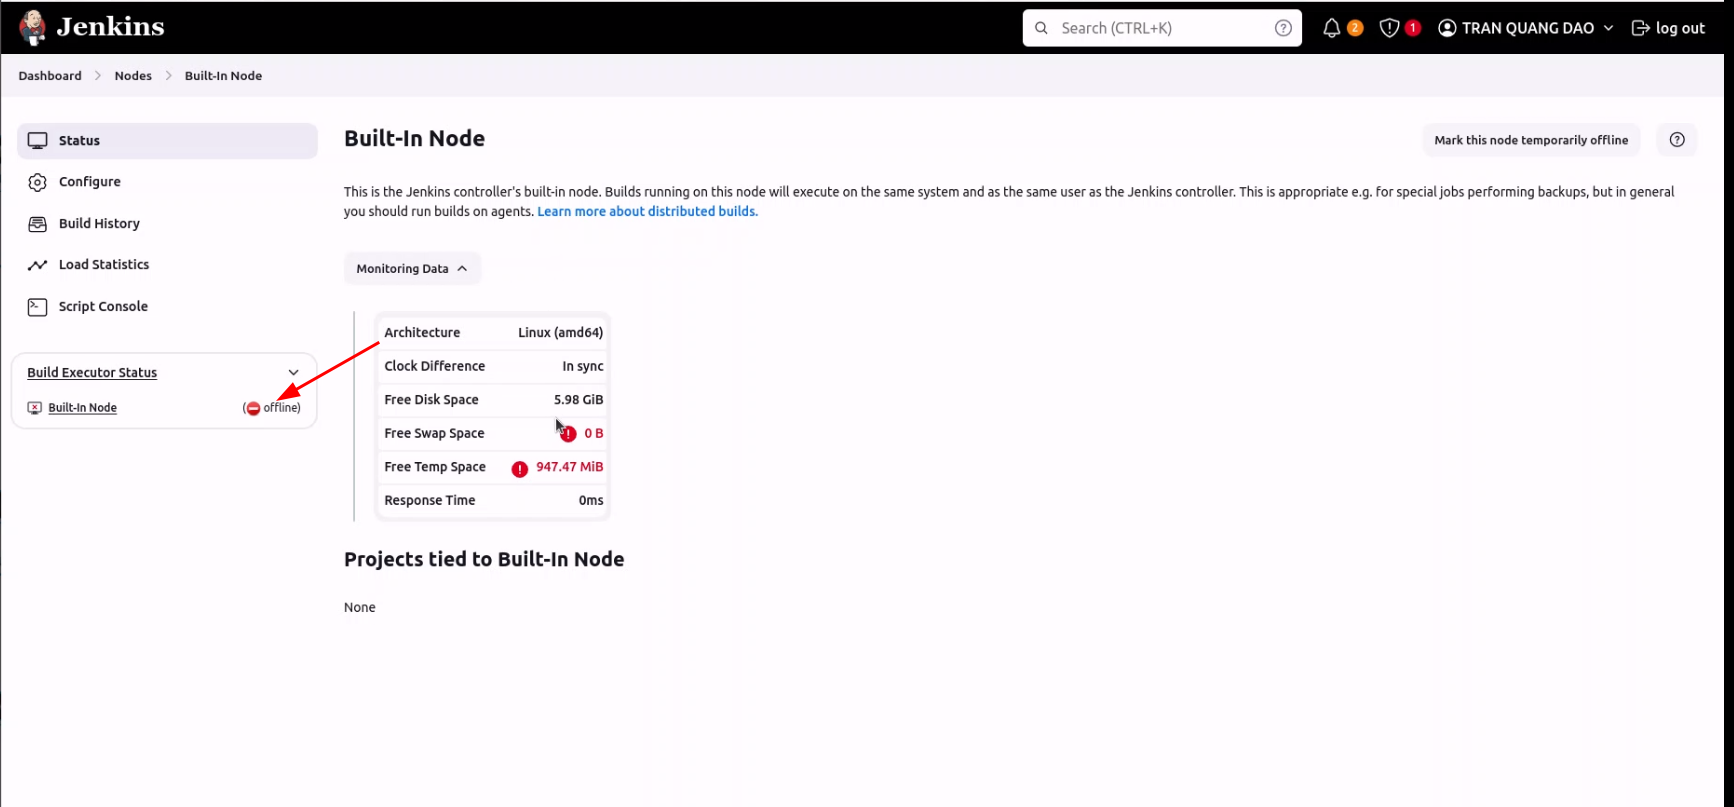
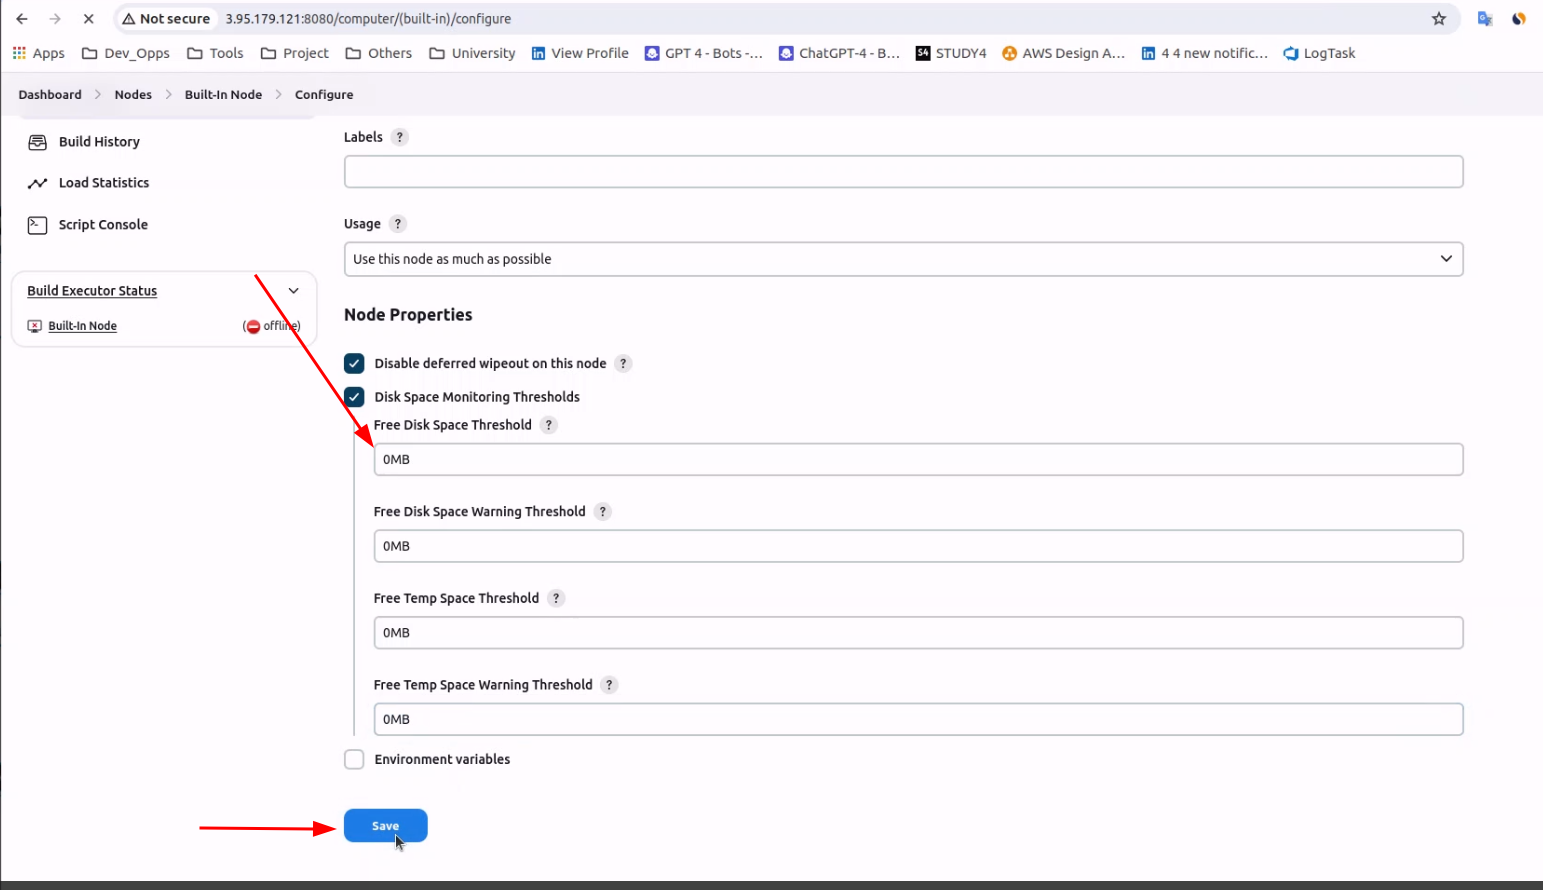
Go to Dashboard => Node => Built-In Node => Configure => Node Properties => Disk space monitoring thresholds => Fill All field to 0MB => Save
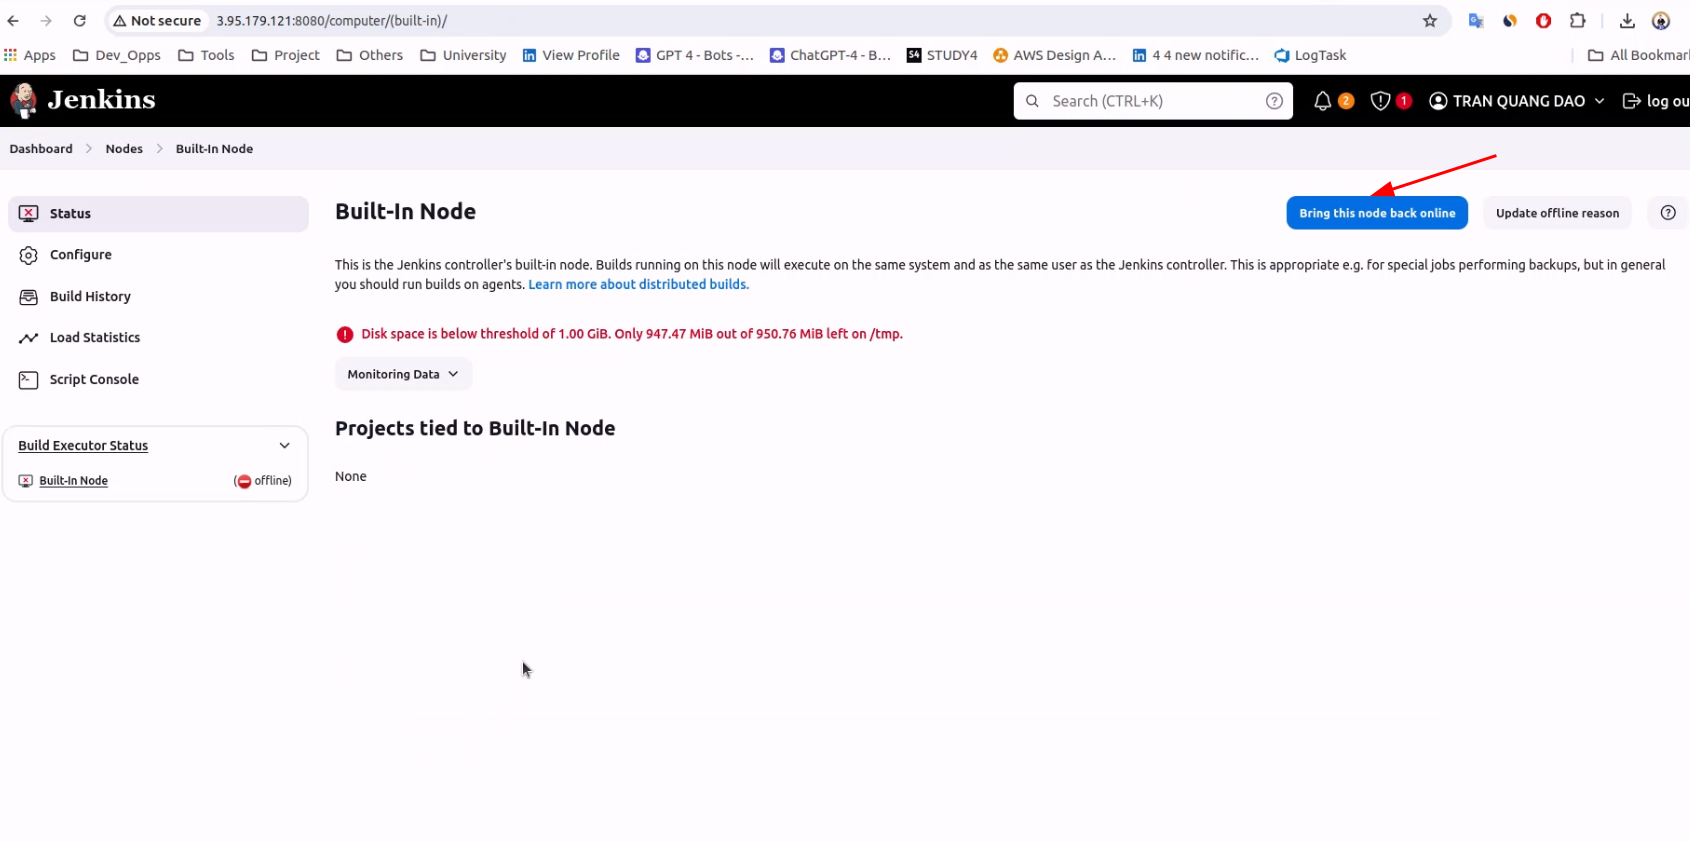
 After config done, let click to
 Bring this node back online
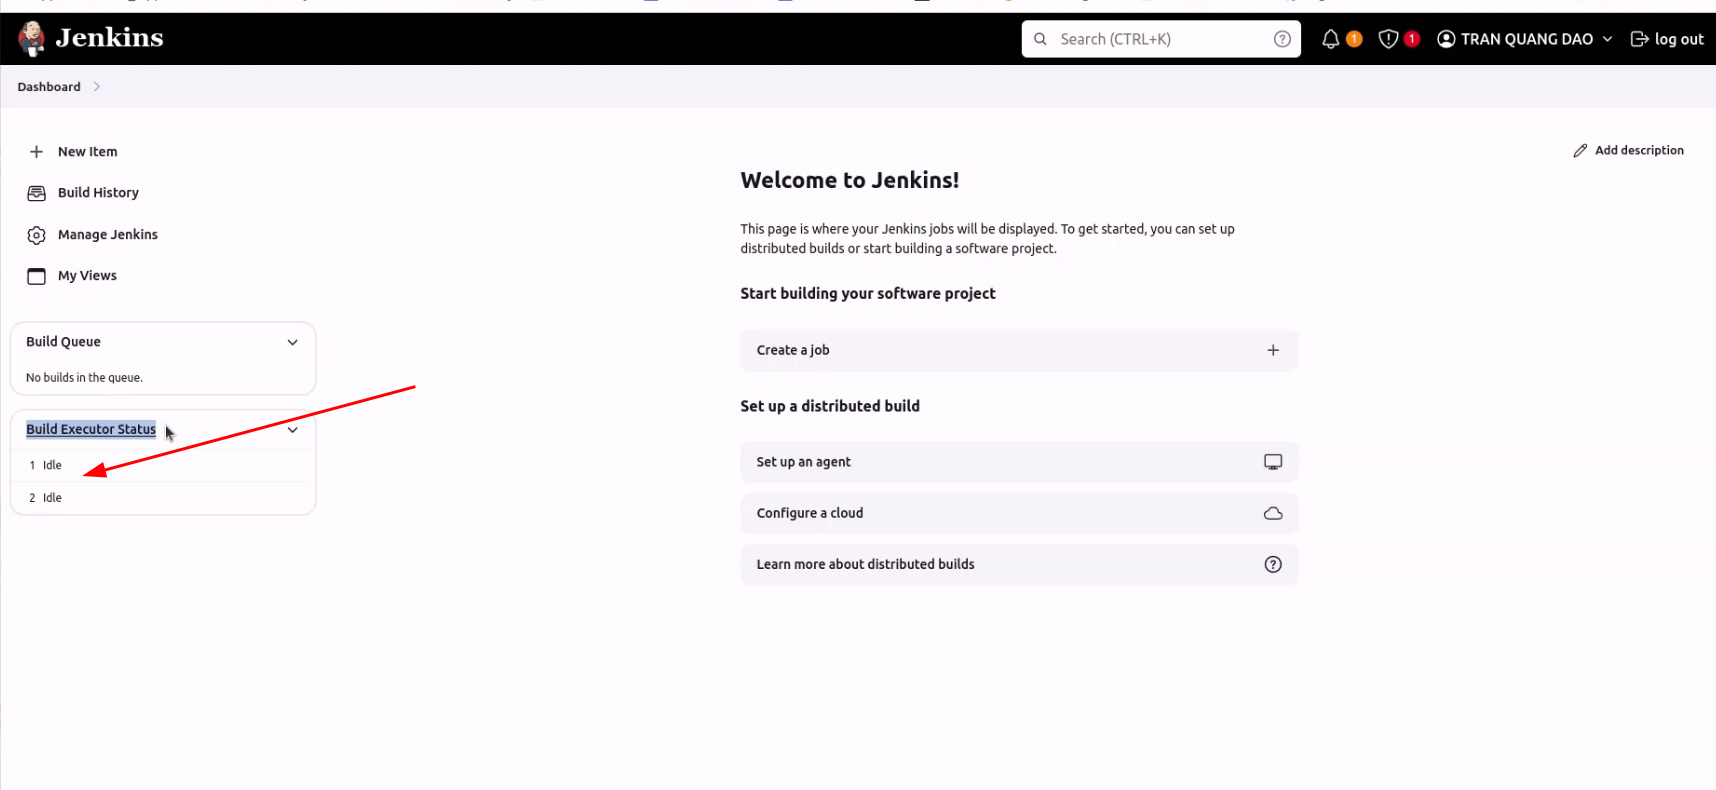
 After done, you can see node backed online.
4.1. Configure aws credentials on Bastion Host
We are need config aws credencials to interactive with aws service when trigger ci/cd.
Using command below to configure aws credentials with jenkins user.
sudo -su jenkins
Using this command to config credentials. By default, aws-cli always available on EC2, we don’t need install aws-cli again.
aws configure
Output:
  aws configure
  AWS Access Key ID [****************]: ****************
  AWS Secret Access Key [****************r]: ****************
  Default region name [us-east-1]: us-east-1
  Default output format [None]:
5. Install helm on Bastion Host
In this project, we will using Helm Chart to manage kubernetes object on EKS Cluster and Jenkins using helm command to apply this.
install the binaries with the following commands.
  curl https://raw.githubusercontent.com/helm/helm/master/scripts/get-helm-3 > get_helm.sh
  chmod 700 get_helm.sh
  ./get_helm.sh
See the version of Helm that you installed.
helm version | cut -d + -f 1
6. Install git on Bastion host
To integration CI/CD , we need to install Git for pull commit change from repository and execute build, run command below to install git.
sudo yum install git -y